




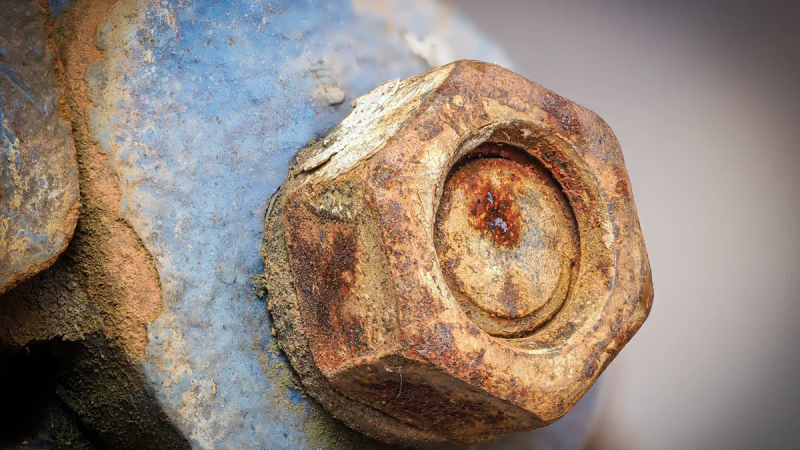
You know the frustration. A rusted bolt won't move, and your torch heats everything around it. You might melt nearby wires or start a fire. An induction heater for bolts changes this struggle completely. It uses electromagnetic fields to heat only the metal around the bolt, not the bolt itself. This focused heating expands the hole, breaking the rust bond safely and fast. You get no open flame, just controlled, exact warmth. In this guide, you will learn the full heat-cool-penetrant cycle. You will master loosening even the toughest fasteners with confidence and ease.
Key Takeaways
Induction heaters heat the metal around a bolt, not the bolt itself. This expands the hole and breaks rust bonds safely.
The heat-cool-penetrant cycle works best. Heat the surrounding metal, let it cool, apply penetrating oil, then remove the bolt.
Always wear safety gear and keep a fire extinguisher nearby. No open flame means less fire risk, but metal gets very hot.
Use a coil that fits snugly around the bolt. A proper fit ensures fast and efficient heating.
If a bolt stays stuck, repeat the cycle. Patience and correct technique free even the toughest fasteners.
Why Use an Induction Heater for Bolts
The Science of Selective Heating
An induction heater for bolts works by using electromagnetic induction. The tool sends an alternating current through a coil. This current makes a magnetic field that changes direction quickly around the coil. When you put a conductive metal bolt inside this field, eddy currents form in the metal. These currents create heat through electrical resistance. Engineers call this process Joule heating.
The key point is where the heat goes. You place the coil around the nut or the metal surrounding the bolt, so the heat builds up in that surrounding metal. This expansion makes the hole grow a little. The rust bond breaks as the metal moves. You do not heat the bolt itself directly. This selective heating makes the process exact and effective.
Field experience shows that the best frequency range for bolt heating is between 8 kHz and 12 kHz. This range gives the best mix of heating efficiency and flexibility. It allows for good coil-to-bolt coupling and handles changes in bore size. The frequency also works well with different bolt lengths.
Key Advantages Over Torches
Traditional torches cause many problems. They produce open flames that can light nearby materials on fire. They heat everything around the bolt, not just the target area. They also create smoke and fumes that hurt air quality. An induction heater removes all these issues.
Speed: The tool heats stuck bolts fast, cutting labor time a lot.
Safety: No open flame means less fire risk and fewer injury dangers.
Precision: The heat targets only the bolt, leaving nearby parts at normal temperature.
Clean operation: No smoke, fumes, or burning byproducts enter the air.
The safety comparison with oxy-acetylene torches is clear. A torch creates an ignition source and heats the shaft, risking damage. An induction heater focuses heat on the bolt while the shaft stays cool. No direct flame contact means little surface damage. The fire risk drops a lot because no open flame exists.
The lack of an open flame, smoke, fuel, and harmful gases creates a much cleaner and safer workplace. It lowers fire hazards and improves air quality, leading to a better work environment.
This makes induction heating great for tight spaces. You can work near plastic, rubber, or wiring without worry. The heat stays where you put it. You get quick, focused warmth that saves time and energy. For auto shops, this efficiency speeds up repair work and keeps projects moving.
Safety First: Prep and Precautions
Essential PPE and Workspace Setup
You need the right safety gear before you start. The metal gets very hot, even without a flame. Your eyes can be hurt by heat, light, and flying bits. Your hands need cover from hot surfaces that can burn right away.
The table below lists the key safety items you should have:
Heat-resistant gloves rated up to 150°C give enough protection for handling hot metal. Some gloves go up to 250°C with extra options. These gloves fit many induction heater brands, so you can use them safely with different tools.
Your workspace needs setup too. Clear the area around your bench. Take away paper, rags, solvents, and other things that can catch fire. Keep a clear path to exits and emergency gear.
Managing Heat and Fire Risk
You might think no flame means no fire risk. That idea is wrong. The metal you heat gets hot enough to light nearby items. A dropped bolt can start a fire if it hits something flammable.
Keep a Class C fire extinguisher close by. This type works for electrical equipment fires. Put a smoke detector in your work area. Know your emergency shutdown steps before you start. Practice turning off the induction heater quickly.
You should also guard nearby parts. Move plastic pieces, rubber hoses, and wiring away from the work spot. These materials melt or burn at much lower temperatures than the metal reaches. Cover them with heat shields if you cannot move them.
Work in a place with good airflow. Even without flame smoke, heating metal can let off fumes. A dust mask or respirator filters bad particles based on your material's safety sheet. Check that sheet before you begin.
Your safety depends on being ready. Get the right gear, clear your space, and know your emergency plan. These steps take minutes but stop serious injuries.
How to Use an Induction Heater for Rusted Bolts
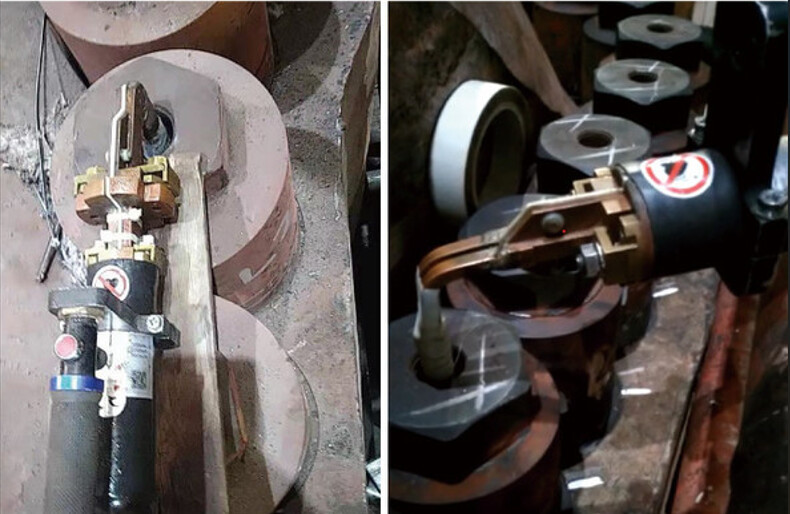
Image description: Canroon CR2100 induction heater for bolt expansion
Preparing the Bolt and Coil Selection
Start with the workspace. Clear all flammable materials from the area. Ensure the workbench is dry and well-lit. Put on your safety gear: gloves, goggles, and long sleeves. These items protect you from heat and flying debris.
Next, clean the bolt. Use a wire brush to remove dirt and loose rust. A clean surface allows better heat transfer. This step also helps you see the bolt clearly during the heating process.
Now select the right coil. The coil size matters a lot. Choose a coil that fits around the bolt with a small gap. The coil should not touch the bolt. A closer fit heats faster. A coil that is too large slows the heating process. A coil that is too small can damage the insulation.
Follow these steps to prepare the coil:
Select the coil size. Choose a coil that fits around the bolt with a small gap. A closer fit transfers heat faster. A coil that is too large slows heating. A coil that is too small damages the insulation.
Shape the coil. Use a U-form coil and wrap it around a socket that matches the bolt size. This creates the correct shape for your application.
Install the coil securely. Ensure the tool is off. Insert the coil fully into the ports. Secure it so it does not move during operation. A stable coil gives consistent heating.
The Heat-Cool-Penetrant Cycle
This cycle uses differential thermal expansion. The technique works by heating the surrounding metal, not the bolt itself. When you heat the surrounding metal, it expands away from the bolt. This expansion loosens the grip of the rust bond. The bolt stays cooler, which creates a gap between the metal and the bolt. In contrast, heating the bolt directly would cause it to expand and tighten further. The different rates of expansion between the two metals allow the bolt to be removed with ease.
Follow this cycle step by step:
Heat the surrounding metal. Turn on the induction heater. Apply heat for five to fifteen seconds. For a 5/8-inch bolt, heat for ten to twelve seconds. Watch the metal until it reaches a cherry red color. This color indicates the bolt has expanded enough to break the rust bond.
Let the bolt cool. After heating, turn off the tool. Wait a few seconds for the metal to cool slightly. This cooling causes the metal to contract. The contraction breaks the rust bond further.
Apply penetrating oil. Spray a high-quality penetrating oil onto the threads. The heat helps the oil seep into tight spaces. The oil works into the threads and lubricates the connection.
Remove the bolt. Use a wrench or socket to turn the bolt. If it does not move, repeat the heating and oil steps. Work slowly and stop if you see cracks or melted parts.
Warning: Do not overheat the bolt. Too much heat can damage the engine block or crack the casting. Always focus the heat only on the bolt, not the surrounding parts. Watch the bolt while heating, as localized heating can cause problems if temperature is not controlled.
This method works on many applications. You can use it on water heaters, leaf spring shackles, and other automotive fasteners. The heat-cool-penetrant cycle is effective for both small and large bolts.
For a reliable tool, consider a quality induction heater designed for bolt removal. Such a tool makes this process fast and safe. You save time and avoid the risks of open flames. The tool pays for itself after a few uses.
Troubleshooting Common Issues
Even with careful technique, you may encounter problems. Here are the most common issues and how to fix them.
Bolt Not Heating Enough
Start with a simple magnet test. Place a magnet against the bolt. If the magnet does not stick, the bolt is likely non-ferrous. Induction heaters work on conductive metals, but they are most effective on ferrous metals. If the magnet does not stick, you may need a different method for stainless steel or aluminum.
Next, check your power supply. Ensure the outlet provides adequate voltage. If using an extension cord, use one that is rated for the tool's power draw and keep the length to a minimum.
Inspect the coil condition. Look for brittle, frayed, or damaged sections. Replace any damaged coils. Ensure the coil connections are tight and making good contact. Refer to the manufacturer's instructions for diagnosing power delivery issues.
Bolt Loosens but Stays Stuck
You may feel the bolt loosen, but it stays in place. This often happens when you heat the bolt head directly. Heating the bolt head causes the bolt to expand. The expansion makes the bolt tighter. This mistake is a "recipe for disaster" because the bolt seizes further.
The correct approach is to heat the surrounding material. Heat the nut or the manifold around the bolt. This expands the hole and releases the bolt. If you already heated the bolt head, let it cool completely. Then apply heat to the surrounding metal.
Repeat the heat-cool-penetrant cycle. Apply heat to the surrounding metal. Let it cool. Apply more penetrating oil. The heat helps the oil seep into the threads. The threads may still be bound by corrosion. Several cycles often break this bond. Patience gives you the best result without damaging the part.
Avoid using the heater near plastic or rubber components. Heat transfers through the metal and can melt nearby parts. Move these components away or use heat shields. Work slowly and check the bolt after each cycle.
The heat-cool-penetrant cycle gives you a proven method. Heat the surrounding metal, let it cool, apply penetrating oil, and turn the bolt free. This approach keeps you safe and speeds up your work.
Customer reviews show the real value of an induction heater for bolts. These tools handle rusted fasteners that would otherwise require cutting or drilling.
A quality induction heater for bolts belongs in every toolbox. The long-term benefits include durability, reliable customer support, and continuous innovation. You get a tool that performs year after year.
Try this technique on your next stubborn fastener. Share your experience.
FAQ
How long does it take to heat a bolt?
Most bolts reach working temperature in five to fifteen seconds. A 5/8-inch bolt typically needs ten to twelve seconds. You will see the metal turn cherry red when it has expanded enough. Watch the color change carefully to avoid overheating.
Can I use this method on stainless steel bolts?
Induction heating works on conductive metals, but it is most effective on ferrous metals. For stainless steel or aluminum, the method may be less effective, and you may need a different removal method. You can test your bolt with a magnet. If the magnet does not stick, the bolt is not ferrous.
Will the induction heater damage nearby plastic parts?
The heat stays focused on the bolt area. However, heat can transfer through the metal over time. Move plastic components away from the work area. Use heat shields when you cannot relocate parts. Work in short bursts to minimize heat spread.
How many heating cycles should I try before giving up?
Start with one full heat-cool-penetrant cycle. If the bolt does not move, repeat the process. Continue until the bolt breaks free, but if it still refuses to turn after several cycles, stop and reassess your technique. You may need a different coil size.
What is the most common mistake beginners make?
Heating the bolt head directly instead of the surrounding metal. This mistake causes the bolt to expand and tighten further. Always focus the heat on the nut or the metal around the bolt. This expands the hole and releases the grip on the threads.
Sign up for updates